Undercupboard Radio SKRP 1000 A1
|
|
|
- Enikő Kozma
- 6 évvel ezelőtt
- Látták:
Átírás


1 4 Undercupboard Radio SKRP 1000 A1 Undercupboard Radio Operating manual Radio podwieszane Instrukcja obsługi Rádió Használati utasítás Podelementni radio Navodila za uporabo Rádio na vestavění Návod k obsluze KOMPERNASS GMBH BURGSTRASSE 21 D BOCHUM ID-Nr.: SKRP 1000 A1-10/10-V6 Rádio Návod na používanie

2 SKRP 1000 A1
3 INDEX PAGE Intended Use 2 Items supplied 2 Technical data 2 Safety instructions 2 The appliance components 4 Setting up the appliance 4 Fixing the kitchen radio beneath a wall cabinet 5 Setting up the kitchen radio 5 The Settings menu 5 Further setting possibilities 7 Radio operation 8 Cleaning 10 Disposal 11 CE Conformity 11 Importer 11 Warranty and Service 11 Read the operating instructions carefully before using the appliance for the first time and preserve this booklet for later reference. Pass this booklet on to whoever might acquire the appliance at a future date
4 Intended Use This Kitchen Radio is intended for use either free-standing or for assembly beneath a wall cabinet. The intended uses for this Kitchen Radio are the reception of FM radio transmissions and as an alarm/timer, using either signal tones or the radio itself. This Kitchen Radio is not intended for utilisation in commercial or industrial applications. The warranty does not provide compensation for damage caused by improper use of the appliance! Items supplied 1 Kitchen radio SKRP 1000 A1 1 Mounting plate 4 Screws 1 Battery 3 V Type CR Operating manual Technical data Power supply: V ~, 50 Hz Power consumption: Operation: 5 W Standby: approx. 1.8 W Output level: 1 W at 10% THD Frequency range UKW (FM) MHz MW (AM) 526,5 1606,5 khz Operating temperature: +5 ~ +35 C Humidity: 5 ~ 90 % (no condensation) Dimensions (W x H x D): 27,5 x 15,7 x 6,4 cm Weight: g Protection class: II / Backup battery 1 x 3 V Type CR2032 (supplied) The technical features of this appliance enable an adjustable reception capability that exceeds the permitted frequency range of 87,5 108 MHz and 526,5 1606,5 khz. In some countries, different national regulations may apply to the assigned radio frequency ranges. Please note that information received outside of the assigned radio frequency ranges may not be utilised, passed on to third parties or otherwise misused. Safety instructions This appliance is not intended for use by individuals (including children) with restricted physical, physiological or intellectual abilities or deficiencies in experience and/or knowledge unless they are supervised by a person responsible for their safety or receive from this person instruction in how the appliance is to be used. Children should be supervised to ensure that they do not play with the appliance. Always remove the power plug before cleaning the appliance. Check the appliance and all parts for visible damages. The safety concept can work only if the appliance is in a faultless condition. The power plug must always be easily accessible, so that in the event of an emergency the appliance can be quickly disconnected from the mains power supply. Risk of electrical shocks. Connect the appliance only to correctly installed and earthed mains power sockets. Ensure that the rating of the local power supply tallies completely with the details given on the rating plate of the appliance. Arrange for Customer Services to repair or replace connecting cables and/or appliances that are not functioning properly or have been damaged. NEVER submerse the appliance in water. Wipe it only with a slightly damp cloth. Do not expose the appliance to rain and never use it in a humid or wet environment.
5 Always take hold of the power cable by the plug. Do not pull on the cable itself and never touch the power cable with wet hands, this could result in either a short circuit or you receiving an electric shock. Do not place the appliance, furniture or anything else on the power cable and ensure that it does not become clamped. NEVER make a knot in the power cable and do NOT bind it together with other cables. The power cable should be positioned so that no one can step on or trip over it. Ensure that the power cable does not become wet during operation. You are not permitted to open the appliance housing or repair the appliance. If the housing is opened, you run the risk of receiving a potentially fatal electric shock and the warranty lapses. Protect the appliance against drip and spray water. Do not place any waterfilled vessels (e.g. flower vases) on or near the appliance. Risk of fire! Do not use the appliance near hot surfaces. Do not place the appliance in locations that are subject to direct sunlight. Otherwise, it may overheat and become irreparably damaged. Do not locate the kitchen radio directly above hotplates. The kitchen radio may be damaged. There is a danger of fire! Never leave the appliance unattended while it is being used. Never cover the ventilation slots of the appliance while it is on. Do not place open fire sources, such as candles, on or near the appliance. Risk of personal injury! Keep the power cable and appliance away from children. Children frequently underestimate the dangers of electrical appliances Provide a stable location for the appliance. Do not operate the appliance if it has sustained a fall or is damaged. Arrange for the appliance to be checked and/or repaired by qualified technicians. Keep batteries well away from children. Children can put batteries into their mouths and swallow them. If a battery is swallowed medical assistance must be sought immediately. Note: Some aggressive furniture finishes can have a destructive influence on the appliance's rubber pads. If necessary, place the appliance on a nonslip pad. Thunderstorms! Equipment connected to a power supply can be damaged during a thunderstorm. You should therefore always remove the plug from the power socket when there is a storm. Notice regarding separation from mains-power The ON/AOT/OFF switch does not completely disconnect the appliance from the power network. Additionally, the appliance consumes power when in standby-mode. To completely separate the appliance from mains power, the power plug MUST be removed from the mains power socket. Notice regarding electrical power surges (EFT / electrical fast transient) and electrostatic discharges: In a case of malfunction due to an electrical fast transient (power surge) and/or electrostatic discharge, the appliance must be returned to default settings in order to re-establish normal operation. Possibly the power supply must be separated and then reconnected. The batteries (if
6 present) must be removed and then reinserted. Information regarding the handling of batteries The appliance uses a battery for memory conservation. For the handling of batteries please observe the following: Risk of explosion! Never subject batteries to excessive heat, such as direct sunlight, fire, etc. Do not recharge the batteries. Never open batteries, never solder or weld batteries. The risk of explosions and injuries exists! Non-observance of the correct polarities when inserting the battery may cause an explosion. The battery may only be replaced by one of the same or an equivalent type. Regularly check the condition of the batteries. Leaking batteries can cause damage to the appliance. If you do not intend to use the appliance for an extended period, remove the batteries. Should the batteries leak, put on a pair of protective gloves and clean the battery compartment and terminals with a dry cloth. Important! No liability/warranty will be considered for damage to the Kitchen Radio caused by the effects of moisture, water penetration or overheating! The appliance components q Mounting plate/baseplate w Power cable e Wire aerial r Display t i M1 M4 - Memory buttons M1 M4 o MEM/AMS - to save and automatically search for and save radio stations a MEM.SCAN - automatic recall of saved radio stations s TIMER - controls the timer programming d Illuminated clamp strip f AL2/VOL - controls the alarm function 2 - Volume reduction g AL1/VOL + - controls the alarm function 1 - Volume increase h USER/BAND - User switching, Radio waveband switching j LIGHT/ - controls the display and DIMMER clamp strip illumination k MODE/ - recalls the settings, LOCK Button lock l DOWN - Selection button down 1( UP - Selection button up 2) Battery compartment 2! ON/AOT/ - Switch the radio on/off OFF controls the switch off timer Setting up the appliance First take all appliance components from the packaging and remove all packing foil and tape. Inserting the battery By inserting the batteries you will avoid the loss of programmed times and alarm timings in the event of a possible power outage. The batteries ensures that the internal clock continues to run even during a power failure. When power is restored the correct time appears automatically in the display r. Note: The appliance can also be operated without a battery. 1. Open the cover of the battery compartment 2) on the underside of the appliance by turning the cover with a coin to the left and the limit stop and then lifting it. 2. Now place the battery of the type CR2032 (supplied) in the battery compartment 2). The side with the marking + should face upwards.
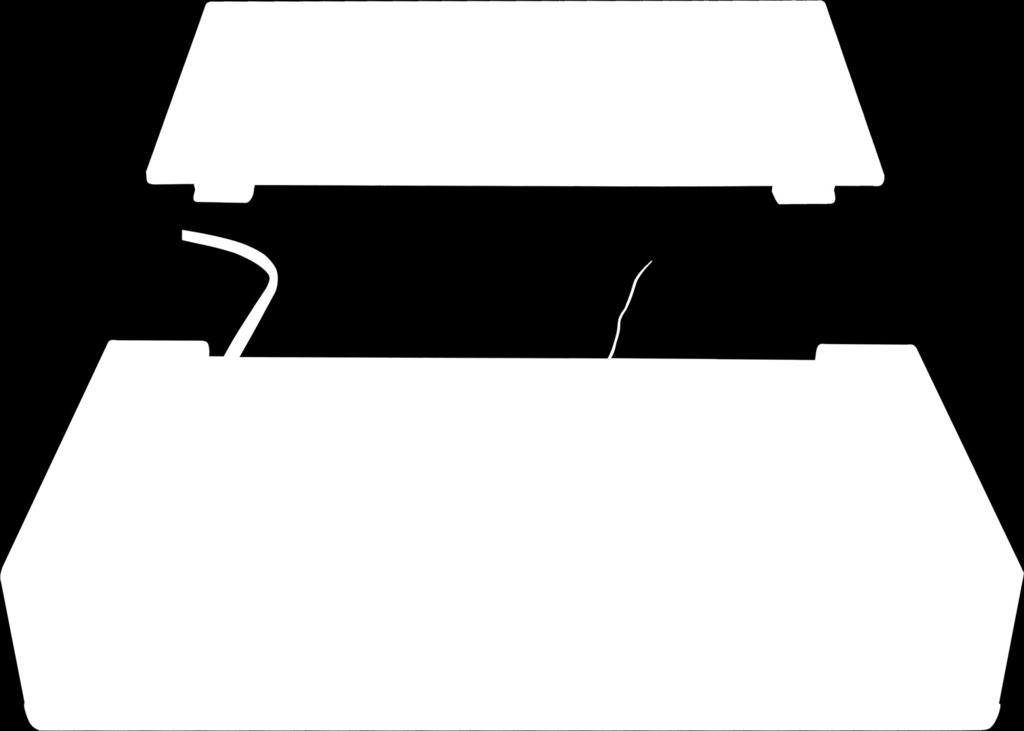
7 3. Close the battery compartment 2) by replacing the cover and then turning the cover with a coin to the right. Fixing the kitchen radio beneath a wall cabinet With the supplied mounting plate q you can fix the kitchen radio below, for example, a kitchen wall cabinet: 1. Determine a suitable location for the kitchen radio. 2. Press the two retaining levers on the back of the appliance down. Push the mounting plate q back and remove it. 3. Hold the mounting plate q under the installation location. Thereby, the front edge of the mounting plate q should be approx. 3.5 cm behind the front of the kitchen cabinet. 4. Mark the four points for the drillholes with a pencil. 5. Using a spike, make a small depression at the marking points. Firmly secure the mounting plate q with the supplied screws. 6. Hold the kitchen radio slanted, with the two recesses in the retaining lugs on the mounting plate q. Press the kitchen radio upwards until it audibly engages. Disassembly To disassemble the kitchen radio, press the two retaining levers at the rear of the appliance downwards. Then pull the radio out to the front and remove it. Unscrew the screws and remove the assembly plate q. Setting up the kitchen radio Do not set the kitchen radio up without the mounting plate q. Otherwise the speakers are covered and the sound is scarcely audible. To fit the kitchen radio with the supplied mounting plate q: 1. Simultaneously press the two retaining levers on the back of the appliance down. Push the mounting plate q back and remove it. 2. Push the two retainer lugs on the mounting plate q into the recesses on the lower rear side of the kitchen radio. 3. Press the mounting plate q firmly in the direction of the appliance rear until it audibly engages. Disassembly Rotate the appliance with the mounting plate to the top. Hold it in the free space between the appliance and the mounting plate. Lightly pull the mounting plate towards yourself and upwards in its front area, so as to free the plate from the front recesses. Remove plate from the appliance. Providing mains power When you have completed installation of the appliance, insert the plug into a mains power socket. The display r is illuminated and the appliance tries to receive an RDS signal to automatically adjust the time and date. For as long as the appliance waits for the RDS signal, the display r shows "Please wait for setting thanks". This can take several minutes. The Settings menu Setting the time Should this not succeed, you must set the clock manually. For this, the radio cannot be switched on (= automatic mode). 1. In automatic mode press the button MODE/LOCK k once. The time display blinks. 2. Press the buttons UP /DOWN 1(/l to set the time in minute intervals. Pressing and holding the button changes the time at ten-minute intervals
8 3. Press the button MODE/LOCK k once again to save the time and switch to the date setting. If you do not press a button for 15 seconds when making the settings, the appliance saves the current setting and returns to automatic mode. Setting the date 1. In automatic mode press the button MODE/LOCK k twice. In the display r appears " ", the date display flashes. 2. Press the buttons UP /DOWN 1(/l to set the date at day intervals. Pressing and holding the buttons changes the date at intervals of 10 days. 3. Press the button MODE/LOCK k once again to save the date and to switch to setting the memory function. If you later press the DOWN button l in automatic mode, the display r briefly shows "DAY". Subsequently, the time and date display alternate themselves. To switch back to an exclusive time display, press the button DOWN l once again. Setting the memory functions You can programme in up to 6 dates, which the appliance will remind you of when they are reached. 1. In automatic mode press the button MODE/LOCK k three times. The display r shows alternatively a date and the SDA 1 indicator for reminder date Press the buttons UP /DOWN 1(/l to set the first desired reminder date. Pressing and holding the buttons changes the date at intervals of 10 days. 3. Press the button MEM./AMS o and then use the buttons UP /DOWN 1(/l to set the hour at which the alarm of the reminder function should sound. 4. When you press the button TIMER s, the year number is deactivated and thus you are reminded on this date every year. 5. Should you wish to programme in further dates, press the button MEM.SCAN a to select the desired memory positions Follow the same steps with the other dates. 7. To deactivate the memory function, programme in a date that lies in the past. 8. Press the button MODE/LOCK k once again to save the settings of the memory function and to switch to setting the update function. Setting the update function Using this function, the appliance can automatically update the settings for the clock based on the RDS data. When the radio is not switched on, this update takes place daily at 3:00 and 5: In automatic mode press the button MODE/LOCK k four times. The display r shows "UP DATE". 2. Press the button DOWN l, to deactivate the Actual-isation function. The blinking clock symbol in the display r then disappears. 3. Press the button UP 1( to reactivate the update function. The hour symbol appears. 4. Press the button MODE/LOCK k once again to save the settings of the update function and to switch to setting the 12 or 24 hour mode. Selecting 12 or 24 hour time display 1. In automatic mode press the button MODE/LOCK k five times. In the display r appears "24 HOUR" for the 24 hour modus. 2. Press the button DOWN l to select the 12 hour modus. In the display r appears "12 HOUR". Press the button UP 1( to return to the 24 hour modus. In the 12 hour mode "AM" appears between 0:00 and 11:59 (ante meridiem = mornings) behind the time display, from 12:00 to 23:59 "PM" (post meridiem = afternoons) is shown in the display r
9 Press the button MODE/LOCK k to save the menu settings and to close it down. Further setting possibilities Setting the display brightness Press the button LIGHT/DIMMER j repeatedly to set the brightness level at which the display should be illuminated. The brightness can be set at 3 levels. Illuminated clamp strip Documents, for example recipes, with a width of up to 10 cm can be inserted and automatically held in the clamp strip d. If you press and hold the button LIGHT/DIMMER j for two seconds, the downward facing lamp is switched on, which then illuminates the recipe. Press and hold the button j once again for two seconds to switch the lamp off. Kitchen timer 1. Press the button TIMER s. 2. Using the buttons UP /DOWN 1(/l, set the desired time interval (a time span between 1 minute and 23:59 h is possible). Pressing and holding one of the buttons changes the display in ten-minute intervals. Or press one of the buttons M1 M4 t i to recall a saved preset time for the kitchen timer. The following times are factory pre-programmed: Button M1 t = 5 min. (Indicator = T1) Button M2 y = 10 min. (Indicator = T2) Button M3 u = 15 min. (Indicator = T3) Button M4 i = 20 min. (Indicator = T4) 3. Press the button TIMER s once again to start the kitchen timer. In the display r a clock icon running in reverse and a cooking pot symbol appears. 4. From 30 seconds before expiry of the time span an acoustic signal sounds, repeating at shorter intervals the closer the set time approaches. When the time has expired, the alarm sounds continuously and with increasing volume. 5. Press any button to stop the alarm, even if the button lock is switched on Interrupting the kitchen timer. To interrupt the kitchen timer, switch to the kitchen timer mode by pressing the button TIMER s. Then briefly press the button TIMER s to interrupt the kitchen timer. The time is halted, the indicator blinks for 10 seconds. After this period the appliance returns to automatic modus. To restart the kitchen timer, briefly press the button TIMER s again to switch back into the kitchen timer mode. Press the button TIMER s once again. The time then continues to run. To completely switch the kitchen timer off, press and hold the button TIMER s for 3 seconds The clock and cooking pot symbol disappear. Programming the kitchen timer You can programme frequently used times for the kitchen timer into the appliance, so that you do not need to enter them in repeatedly. As the appliance can be used by several people, it has user switching, A/B. Both users can save 4 different timer periods each. 1. First, select the desired user. To switch between users, press and hold the button USER/BAND h for two seconds. 2. Then press the button TIMER s. 3. Using the buttons UP /DOWN 1(/l enter in the desired time. 4. Press the button MEM/AMS o. On the right and next to the time indicator, "T" lights up. 5. Press one of the pre-set buttons M1 M4 t i, under which the kitchen timer period should be saved. Its number is now shown to the right of the "T". 6. Press the button MEM/AMS o once again to conclude the saving. Setting alarm times (Alarms 1 and 2) You can programme two alarm times into your kitchen radio.
10 Alarm function Acoustic signal Radio Switched off Symbol in the display r no symbol 1. In automatic mode press the button AL1/ VOL. + g (or AL2/VOL. f). In the display r the last set alarm time and the symbol for the type of alarm blink for 10 seconds. 2. Press the buttons UP /DOWN 1(/l to set the desired alarm time. 3. Press the button AL1/VOL. + g (or AL2/ VOL. f) repeatedly until the desired alarm function (see the table above) is indicated in the display r. 4. Repeatedly press the button TIMER s to set the weekdays on which you require the alarm function: You can select between "workdays" (Mo, Tu, We, Th, Fr), "weekends" (Su, Sa) and "every day" (Su, Mo, Tu, We, Th, Fr, Sa). Thereby, orientate yourself on the weekday indicator in the display r: Mo = Monday Tu = Tuesday We = Wednesday Th = Thursday Fr = Friday Sa = Saturday Su = Sunday. 5. If you hold the button TIMER s pressed down for 2 seconds, you can also, through repeated brief pressing of the TIMER s button, select a specific weekday (e.g. only "We"). The selected setting is indicated in the display r. 6. To return to the selection of workdays, weekends or whole weeks, once again hold the button TIMER s pressed down for 2 seconds. 7. After 10 seconds the blinking in the display stops and your input is saved. The appliance then returns to automatic modus. When the alarm signal sounds... and the alarm function "Radio" has been selected, the radio plays for one hour at a pre-defined alarm volume. To finish press any button, even if the button lock is switched on. and the alarm function "Signaltones" has been selected, the signal tone sounds for 10 minutes, with an increasing volume. To finish press any button, even if the button lock is switched on. The Reminder function The appliance can remind you of a date that you have set with the reminder function. In this case, the acoustic reminder alarm will sound for 10 minutes at the set hour. In addition, the SDA indicator flashes in the display r. Press any button to stop the reminder alarm, even if the button lock is switched on. Radio operation For radio reception, completely unwind the wire aerial e and, with the radio switched on, determine the most favourable positioning for it. The appliance has a built-in ferrite aerial for the reception of MW transmitters. Should the MW reception be insufficient, please turn the appliance towards a more favourable direction. Switching the radio on and off 1. To switch the radio function on, press the button ON/AOT/OFF 2!. In the display r the currently selected frequency is shown. 2. Press the button ON/AOT/OFF 2! once again to switch the radio off and return the appliance to the automatic modus
11 Note: By pressing and holding the button ON/AOT/OFF 2! you switch to the function switch-off time (see S. 10 chapter AOT Switch-off timer). Manual station selection 1. Using the button USER/BAND h, select the required radio frequency: MW (AM) or VHF (FM). 2. Briefly press the button UP 1( repeatedly to search for stations with a higher frequency than the one shown in the display r. 3. Briefly press the button DOWN l repeatedly to search for stations with a lower frequency than the one shown in the display r. 4. Should the currently selected radio station transmit RDS data, the -indicator lights-up in the display r. Then the display r shows the name of the radio station, and the time is updated (if activated in the settings, see section "Setting Update function"). Automatic station search You can have the kitchen radio search for stations. The kitchen radio searches the frequency range until it finds a station. 1. Press and hold the button UP 1( for two seconds: the kitchen radio searches for the station with the next highest frequency. 2. Press and hold the button DOWN l for two seconds: the kitchen radio searches for the station with the next lowest frequency. Repeat these steps until you have found a radio station to your liking. Save and recall a radio station manually As the appliance can be used by numerous people, it is fitted with user switching, A/B. Both users can save different radio stations. To switch between users, press and hold the button USER/BAND h for three seconds. The selected user "A" or "B" is indicated in the display. Each user can save 36 radio stations in the appliance. 32 x VHF stations and 4 x MW stations. For saving UKW stations, User "A" has available: Preset button M1 t for the save positions A1 A8, Preset button M2 y for the save positions B1 B8, Preset button M3 u for the save positions C1 C8, and Preset button M4 i for the save positions D1 D8. Available for User "B" are: Preset button M1 t for the save positions 11 18, Preset button M2 y for the save positions 21 28, Preset button M3 u for the save positions 31 38, and Preset button M4 i for the save positions Press the corresponding preset button once to address the save position "1", press twice for "2", etc. With MW radio stations, each preset button is for one of the 4 save positions. 1. Setting the user, the desired radio wavelength and the desired radio station. 2. Press the button MEM/AMS o. In the display r the save position indicator and "MEM" blink. 3. Press one of preset buttons M1 M4 t i, if necessary repeatedly, to save the radio station to the desired save position. In the display r, the indicator for the save position selected by you and "MEM" blink. 4. Press the button MEM/AMS o once again. "MEM" and the memory space will be briefly displayed, the station is now saved
12 5. Repeat the steps 1 to 4 (for both users) until all of the desired radio stations are saved. 6. To recall the saved radio stations, press the corresponding preset buttons (M1 M4 t i) in radio mode, several times if need be, until the number of the saved position appears in the display r. Automatically save and recall a radio station With the AMS function (Automatic Memory System), the radio automatically searches for radio stations and then saves them to the available save positions in the radio waveband. Previously saved radio stations are thereby erased. 1. Press and hold the button MEM/AMS o for two seconds. The kitchen radio automatically searches for sufficiently powerful radio stations and saves them in the memory. 2. The station search can be stopped by pressing on the button MEM/AMS o. The most recently found radio station plays. 3. When you press the button MEM.SCAN a, the saved radio stations are recalled in their sequence and each is played for 10 seconds. 4. To quickly move on to another radio station, press the button MEM.SCAN a. 5. To quit the automatic recall, press the button MODE/LOCK k. The display r will then show the time for 10 seconds. Adjusting the volume. To reduce the sound volume, in radio operation repeatedly press the button AL2/ VOL f, or hold the button down. To increase the sound volume, in radio operation repeatedly press the button AL1/ VOL. + g, or hold the button down. Lock function You can lock the kitchen radio so that settings cannot be altered by unauthorised people or children. Press and hold the button MODE/LOCK k for 3 seconds. A key symbol appears in the display r. When a key is pressed and the lock is activated, the key symbol blinks but no other functions are carried out. To disable the lock function, press and hold the button MODE/LOCK k until the key symbol extinguishes. A.O.T. - Switch-off timer This appliance is fitted with a switch-off timer for up to 90 minutes. 1. With the radio switched on, press the button ON/AOT/OFF 2! down for 2 seconds to recall the function. 2. Repeatedly press the button ON/AOT/ OFF 2! to programme in the number of minutes, in increments of 5 minutes, for which the appliance is to remain switched on. After a few seconds the display again shows the radio station currently being played. 3. On expiry of the time period the appliance switches itself off. 4. To switch the appliance off prematurely, repeatedly press the ON/AOT/OFF button 2! until "AOT OFF" is indicated in the display. Cleaning Warning! Always remove the plug before cleaning the appliance! Moisture penetrating into the appliance creates the risk of electric shock! Additionally, the kitchen radio could become irreparably damaged! Clean the housing of the kitchen radio with a slightly moist cloth and a mild detergent only. Ensure that moisture cannot permeate into the appliance during cleaning!
13 Disposal Do not dispose of the appliance in your normal domestic waste. This product is subject to the provisions of European Directive 2002/96/EC. Disposing of the appliance Arrange for the product, or parts of it, to be disposed of by a professional disposal company or by your communal waste facility. Observe the currently applicable regulations. In case of doubt, please contact your waste disposal centre. Disposal of batteries/accumulators Used batteries/rechargeable batteries may not be disposed of in household waste. Batteries/rechargeable batteries can contain toxic substances which may damage the environment. Therefore, dispose of the batteries/rechargeable batteries in accordance with statutory regulations. Every consumer is statutorily obliged to dispose of batteries/rechargeable batteries to a community collection centre in their district or to a dealer. The purpose of this obligation is to ensure that batteries are disposed of in a non-polluting manner. Only dispose of batteries when they are fully discharged. Disposal of packaging Dispose of all packaging materials in an environmentally friendly manner. CE Conformity This device complies, regarding conformity, to the basic requirements and other relevent provisions of the Low Voltage Directive 2004/108/EC, the Directive for Low Voltage Appliances 2006/95/EC and the Eco Design Directive 2009/125/EC (Ordinance 1275/2008 Appendix II, Number 1). Importer KOMPERNASS GMBH BURGSTRASSE BOCHUM, GERMANY Warranty and Service The warranty for this appliance is for 3 years from the date of purchase. The appliance has been manufactured with care and meticulously examined before delivery. Please retain your receipt as proof of purchase. In the event of a warranty claim, please make contact by telephone with our Service Department. Only in this way can a post-free despatch for your goods be assured. The warranty covers only claims for material and maufacturing defects, but not for transport damage, for wearing parts or for damage to fragile components, e.g. buttons or batteries. This product is for private use only and is not intended for commercial use. The warranty is void in the case of abusive and improper handling, use of force and internal tampering not carried out by our authorized service branch. Your statutory rights are not restricted in any way by this warranty. The warranty period will not be extended by repairs made unter warranty. This applies alsoto replaced and repaired parts. Any damage and defects extant on purchase must be reported immediately after unpacking the appliance, at the latest, two days after the purchase date. Repairs made after the expiration of the warranty period are subject to payment. DES Ltd Tel.: ( 0.10 / minute) support.uk@kompernass.com
14 - 12 -
15 SPIS TREŚCI STRONA Użytkowanie zgodne z przeznaczeniem 14 Zakres dostawy 14 Dane techniczne 14 Wskazówki bezpieczeństwa 14 Elementy urządzenia 16 Uruchamianie urządzenia 17 Montowanie radia kuchennego pod szafką wiszącą 17 Ustawienie radia kuchennego 17 Menu ustawień 18 Pozostałe możliwości ustawień 19 Słuchanie radia 21 Czyszczenie 23 Utylizacja 23 Deklaracja zgodności CE 24 Importer 24 Gwarancja i serwis 24 Przed pierwszym użyciem zapoznaj się z instrukcją obsługi i zachowaj ją w celu późniejszego wykorzystania. W przypadku przekazania urządzenia osobom trzecim należy przekazać im także instrukcję
16 Użytkowanie zgodne z przeznaczeniem Radio kuchenne jest przeznaczone do ustawienia lub montażu pod szafką. Radio kuchenne jest przeznaczone do odbioru stacji radiowych nadających w zakresie FM oraz do budzenia sygnałem akustycznym lub radiem. Radio kuchenne nie jest przeznaczone do zastosowań przemysłowych lub profesjonalnych. Za szkody, powstałe w wyniku zastosowania niezgodnego z przeznaczeniem, producent nie ponosi żadnej odpowiedzialności! Zakres dostawy 1 Radio kuchenne SKRP 1000 A1 1 Płyta montażowa 4 Śruby 1 Bateria 3 V typ CR Instrukcja obsługi Dane techniczne Przyłącze sieciowe: Pobór mocy Praca: Tryb czuwania: Moc wyjściowa: Zakres częstotliwości UKF: V ~, 50 Hz 5 W około 1,8 W 1 W przy 10% THD (FM) 87,5 108 MHz MW (AM) 526,5 1606,5 khz Temperatura robocza : +5 do +35 C Wilgotność: 5-90 % (przy braku kondensacji) Wymiary (Szer x Gł x Wys): 27,5 x 15,7 x 6,4 cm Masa: g Klasa ochrony: II / Bateria zasilania awaryjnego 1 x 3 V typ CR2032 (dołączona) Parametry techniczne urządzenia umożliwiają odbiór częstotliwości spoza dopuszczalnego zakresu 87,5 108 MHz i 526,5 1606,5 khz. W każdym kraju mogą obowiązywać różne przepisy odnośnie przydzielonych zakresów częstotliwości radiowych. Należy pamiętać, że informacji odbieranych poza przydzielonym zakresem częstotliwości radiowych nie można przetwarzać, przekazywać osobom trzecim ani wykorzystywać niezgodnie z ich przeznaczeniem. Wskazówki bezpieczeństwa Urządzenie nie jest przeznaczone do użytkowania przez osoby (w tym dzieci) z ograniczoną sprawnością fizyczną, ruchową bądź umysłową lub nieposiadające doświadczenia i/lub wiedzy, chyba że będą one przebywały pod opieką osoby odpowiedzialnej za ich bezpieczeństwo lub uzyskają od niej wskazówki dotyczące właściwego używania urządzenia. Nie można pozwolić dzieciom na zabawę urządzeniem. Przed rozpoczęciem czyszczenia wyciągnąć wtyczkę z gniazdka. Sprawdzić urządzenie oraz wszelkie jego elementy pod kątem widocznych uszkodzeń. Bezpieczeństwo urządzenia gwarantowane jest wyłącznie wtedy, gdy urządzenie jest w niezawodnym stanie. Wtyczka musi być zawsze łatwo dostępna, aby w sytuacji awaryjnej możliwe było jak najszybsze odłączenie urządzenia od zasilania elektrycznego. Niebezpieczeństwo porażenia prądem elektrycznym! Podłączaj urządzenie tylko i wyłącznie do prawidłowo zainstalowanego i uziemionego gniazdka zasilania. Napięcie w sieci elektrycznej musi być zgodne z danymi podanymi na tabliczce znamionowej urządzenia.
17 Niesprawne urządzenia lub przewody elektryczne przekaż niezwłocznie do naprawy lub wymień w punkcie obsługi klienta. Nie wolno zanurzać urządzenia w wodzie. Do wycierania użyj lekko zwilżonej szmatki. Urządzenia nie wolno wystawiać na działanie deszczu ani używać go w wilgotnym lub mokrym środowisku. Kabel sieciowy chwytaj zawsze za wtyczkę. Nigdy nie pociągaj za sam kabel i nie dotykaj go mokrymi rękami, gdyż może to spowodować zwarcie lub porażenie prądem elektrycznym. Nigdy nie stawiaj na kabel sieciowy samego radia, mebli itp. i uważaj, aby kabel nie został zakleszczony. Nigdy nie wiąż kabla sieciowego na supeł ani nie łącz kabla z innymi kablami. Kabel sieciowy układaj w taki sposób, aby nikt nie mógł na niego nastąpić ani potknąć się o kabel. Pamiętaj, aby przewód zasilania nigdy nie był wilgotny lub mokry. Nie wolno otwierać obudowy ani samodzielnie naprawiać urządzenia. Po otwarciu obudowy występuje niebezpieczeństwo śmiertelnego porażenia prądem elektrycznym, a gwarancja ulega unieważnieniu. Urządzenie należy chronić przed kroplami i rozpryskami wody. Nie stawiaj na urządzeniu ani przy nim żadnych naczyń z płynami (np. wazonów na kwiaty). Niebezpieczeństwo pożaru! Nie używać urządzenia w pobliżu gorących powierzchni. Nie stawiać urządzenia w miejscach wystawionych bezpośrednio na działanie promieni słonecznych. Działanie wysokiej temperatury może spowodować przegrzanie urządzenia i trwałe uszkodzenie. Nie zawieszać radia kuchennego nad kuchenką. W przeciwnym wypadku urządzenie może ulec uszkodzeniu. Istnieje zagrożenie pożarem! W trakcie używania nigdy nie zostawiać urządzenia bez nadzoru. Przy włączonym urządzeniu nie wolno zasłaniać otworów wentylacyjnych. Na urządzeniu lub obok niego nie umieszczaj żadnych otwartych źródeł ognia, np. zapalonych świeczek. Zagrożenie odniesieniem obrażeń! Trzymaj dzieci z dala od przewodu przyłączeniowego i urządzenia. Dzieci potrafią lekceważyć niebezpieczeństwo, jakie niesie z sobą kontakt z urządzeniami elektrycznymi. Należy zadbać o ustawienie urządzenia na stabilnej powierzchni. Nie włączać urządzenia, jeśli spadło z wysokości lub zostało uszkodzone. Zleć sprawdzenie i ewentualną naprawę urządzenia wykwalifikowanemu specjaliście. Baterie należy trzymać w miejscu niedostępnym dla dzieci. Dziecko może połknąć baterię. W wypadku połknięcia baterii należy jak najszybciej skorzystać z pomocy medycznej. UWAGA: Niektóre agresywne lakiery do mebli mogą uszkodzić gumowe nóżki urządzenia. W takim przypadku urządzenie należy ustawić na stabilnie leżącej podkładce. Burza! Podczas burzy urządzenia podłączone do sieci elektrycznej mogą ulec uszkodzeniu. Dlatego w trakcie burzy należy zawsze wyciągnąć wtyczkę z gniazdka
18 Wskazówka odnośnie oddzielenia od sieci Przełącznik ON/AOT/OFF nie odcina urządzenia całkowicie od sieci zasilania elektrycznego. Poza tym urządzenie pobiera w trybie gotowości prąd elektryczny. Dopiero wyjęcie wtyczki z gniazdka zasilania spowoduje całkowite odcięcie urządzenia od zasilania sieciowego. Wskazówka odnośnie napięcia udarowego (EFT / szybkozmienne zakłócenia przejściowe) i wyładowań elektrostatycznych: W wypadku zakłóceń w działaniu urządzenia na skutek szybkozmiennych zakłóceń przejściowych (napięcie udarowe) wzgl. wyładowań elektrostatycznych urządzenie należy wyłączyć i ponownie włączyć, w celu przywrócenia normalnego działania. Może być również koniecz-ne odłączenie urządzenia od zasilania i ponowne podłączenie. Baterie (jeśli występują) należy wyjąć i ponownie włożyć. Wskazówki odnośnie postępowania z bateriami W urządzeniu zastosowano baterii do podtrzymywania pamięci. Podczas obchodzenia się z bateriami należy przestrzegać następujących zasad: Niebezpieczeństwo wybuchu! Nie kładź baterii w nadmiernie nagrzanych miejscach, takich jak miejsca ogrzewane promieniami słonecznymi, ognisko itp. Nie wolno ładować rozładowanych baterii. Baterii nie wolno otwierać, lutować ani spawać. Istnieje niebezpieczeństwo wybuchu i odniesienia obrażeń! Regularnie sprawdzaj stan baterii. Rozlane baterie mogą spowodować uszkodzenia urządzenia. Pomylenie biegunów podczas wkładania baterii może doprowadzić do wybuchu. Zużytą baterię należy wymieniać na nową o tej samej mocy i tym samym typie. Wyjmij baterie z urządzenia, jeśli zamierzasz go nie używać przez dłuższy czas. W przypadku rozlania baterii załóż rękawice ochronne i wyczyść schowek na baterie oraz styki za pomocą suchej szmatki. Uwaga! Gwarancja nie obejmuje uszkodzeń radia kuchennego wskutek działania wilgoci, przedostania się wody do jego wnętrza bądź przegrzania! Elementy urządzenia q Płyta montażowa/podstawka w Przewód zasilający e Antena przewodowa r Wyświetlacz t i M1 M4 - przyciski miejsc pamięci M1 M4 o MEM/AMS - do zapamiętywania i automaty-cznego wyszukiwania i zapamiętywania stacji radiowych a MEM.SCAN - do automatycznego wybierania zapamiętanych stacji radiowych s TIMER - obsługa programowania minutnika d Podświetlana listwa zaciskowa f AL2/VOL - obsługa funkcji alarmu 2 - zmniejszanie głośności g AL1/VOL + - obsługa funkcji alarmu 1 - zwiększanie głośności h USER/ - zmiana użytkownika, BAND zmiana pasma radiowego j LIGHT/ - obsługa podświetlenia DIMMER wyświetlacza i listwy zaciskowej k MODE/ - otwiera ustawienia, LOCK blokada przycisków
19 l DOWN - przycisk wyboru w dół 1( UP - przycisk wyboru w górę 2) Komora na baterie 2! ON/AOT/ - włączanie / wyłączanie OFF radia obsługa zegara sterującego czasem wyłączenia Uruchamianie urządzenia Wyjmij wszystkie elementy urządzenia z opakowania i usuń wszelkie materiały opakowaniowe. Wkładanie baterii Bateria stanowi źródło zasilania awaryjnego urządzenia w przypadku przerwy w zasilaniu elektrycznym z sieci i tym samym chroni urządzenie przed utratą zaprogramowanego czasu zegarka i czasów alarmów. Bateria podtrzymuje pracę zegarka w czasie przerwy w zasilaniu sieciowym. Po przywróceniu zasilania elektrycznego z sieci, na wyświetlaczu r wyświetla się automatycznie prawidłowy czas. UWAGA: Urządzenie może również pracować bez baterii. 1. Otwórz klapkę komory na baterię 2) pod urządzeniem, obracając tę klapkę przy pomocy monety do oporu w lewo, a następnie podważając. 2. Do komory na baterię 2) włóż baterię typu CR2032 (dołączona do urządzenia). Strona z zaznaczeniem + jest skierowana do góry. 3. Zamknij komorę na baterię 2), zakładając klapkę i obracając ją przy pomocy monety w prawo. Montowanie radia kuchennego pod szafką wiszącą Przy użyciu dołączonej płyty montażowej q radio kuchenne można zawiesić np. przy szafce kuchennej: 1. Wybierz odpowiednie miejsce do przymocowania radia kuchennego. 2. Naciśnij dwie dźwignie blokujące z tyłu obudowy w dół. Przesuń płytę montażową q do tyłu, a następnie ją zdejmij. 3. Przytrzymaj płytę montażową q pod miejscem zamontowania radia. Przednia krawędź płyty montażowej q powinna się przy tym znajdować około 3,5 cm za frontem szafki kuchennej. 4. Zaznacz ołówkiem cztery punkty na otwory. 5. Za pomocą trzpienia wykonaj małe zagłębienie w zaznaczonych miejscach. Przykręć płytę montażową q za pomocą znajdujących się w zakresie dostawy śrub. 6. Włóż radio kuchenne pod kątem dwoma otworami do nosków mocujących w płycie montażowej q. Przyciśnij radio kuchenne do góry, aż radio w słyszalny sposób zatrzaśnie się na płycie. Demontaż Aby zdjąć radio, naciśnij dwie dźwignie blokujące z tyłu obudowy w dół. Wyciągnij radio do przodu i je zdejmij. Odkręć śruby i zdejmij płytę montażową q. Ustawienie radia kuchennego Radia kuchennego nie należy ustawiać bez płyty montażowej q. W przeciwnym razie głośnik będzie zasłonięty i muzyka będzie przytłumiona. Sposób ustawienia radia kuchennego za pomocą dostarczonej płyty montażowej q: 1. Naciśnij jednocześnie dwie dźwignie blokujące z tyłu obudowy w dół. Przesuń płytę montażową q do tyłu, a następnie ją zdejmij. 2. Wsuń oba noski mocujące w płycie montażowej q w zagłębienia umieszczone z tyłu na spodzie radia kuchennego. 3. Płytę montażową q dociśnij mocno w kierunku tyłu urządzenia, aż do wyraź
20 nego zatrzaśnięcia się płyty. Teraz radio kuchenne można już ustawić. Demontaż Urządzenie z płytką montażową obróć do góry. Chwyć w miejscu wolnej przestrzeni między urządzeniem a płytką montażową. Płytkę montażową wyciągnij za przód do siebie i do góry, by zwolnić ją z przednich zagłębień. Zdejmij płytkę z urządzenia. Podłączanie do zasilania prądem Po prawidłowym zabudowaniu lub ustawieniu urządzenia, podłącz wtyczkę do gniazdka sieciowego. Wyświetlacz r zapala się i urządzenie podejmuje próbę odebrania sygnału RDS, w celu automatycznego ustawienia czasu i daty. W czasie oczekiwania urządzenia na sygnał RDS, na wyświetlaczu wyświetla się napis r Please wait for setting thanks. Może to potrwać kilka minut. Menu ustawień Ustawianie godziny Gdy powyższa operacja zakończy się niepowodzeniem, czas trzeba ustawić ręcznie. Radio nie może być wtedy włączone (= tryb automatyki). 1. Gdy radio jest w trybie automatyki naciśnij jeden raz przycisk MODE/LOCK k. Miga wskazanie czasu. 2. Naciskaj przyciski UP /DOWN 1(/l, by ustawić czas w przedziałach jednominutowych. Naciśnięcie i przytrzymanie przycisku powoduje zmianę w odstępach co 10 minut. 3. Naciśnij przycisk MODE/LOCK k ponownie, by zapamiętać czas i przejść do ustawiania daty. Gdy podczas ustawiania przez 15 sekund nie zostanie naciśnięty żaden przycisk, urządzenie zapamięta ustawienie i powróci do trybu automatyki Ustawianie daty 1. W trybie automatycznym naciśnij dwa razy przycisk MODE/LOCK k. Na wyświetlaczu r pojawi się data , wskazanie daty miga. 2. Naciskaj przyciski UP /DOWN 1(/l, aby ustawić wskazanie daty w odstępach dziennych. Naciśnięcie i przytrzymanie przycisku powoduje zmianę w odstępach co 10 dni. 3. Naciśnij przycisk MODE/LOCK k ponownie, by zapamiętać datę i przejść do ustawienia funkcji przypominania. Gdy później w trybie automatyki naciśniesz przycisk DOWN l, na wyświetlaczu r wyświetli się na chwilę napis DAY. Następnie naprzemiennie wyświetla się wskazanie godziny i daty. Naciśnij ponownie przycisk DOWN l, by przejść do wskazania samego czasu. Ustawianie funkcji przypominania Możesz zaprogramować 6 różnych terminów, o których urządzenie będzie ci przypominało. 1. Gdy radio jest w trybie automatyki naciśnij trzy razy przycisk MODE/LOCK k. Na wyświetlaczu r wyświetla się naprzemian wskazanie daty i wskazanie SDA 1 oznaczające 1 datę przypominania. 2. Naciskaj przyciski UP /DOWN 1(/l, by ustawić żądaną datę przypominania. Naciśnięcie i przytrzymanie przycisku powoduje zmianę w odstępach co 10 dni. 3. Naciśnij przycisk MEM./AMS o, by następnie przyciskami UP /DOWN 1(/l ustawić godzinę uruchomienia się alarmu funkcji przypominacza. 4. Po naciśnięciu przycisku TIMER s, wyłącza się wskazanie roku i tym samym urządzenie będzie przypominało o ustawionej dacie każdego roku. 5. By zaprogramować pozostałe daty, naciśnij przycisk MEM.SCAN a, by wybrać żądane miejsce w pamięci 2-6.
21 6. Tak samo postępuj w przypadku ustawiania pozostałych danych. 7. By wyłączyć funkcję przypominania, zaprogramuj datę z przeszłości. 8. Naciśnij ponownie przycisk MODE/ LOCK k, by zapamiętać ustawienie funkcji przypominania i przejść do ustawienia funkcji aktualizacji. Ustawianie funkcji aktualizacji Za pośrednictwem tej funkcji urządzenie może automatycznie aktualizować ustawienia czasu na podstawie odbieranych danych RDS. Gdy radio jest wyłączone, aktualizacja ta jest przeprowadzana codziennie o godzinie 3:00 i 5: Gdy radio jest w trybie automatyki naciśnij cztery razy przycisk MODE/LOCK k. Na wyświetlaczu r wyświetla się UP DATE. 2. Naciśnij przycisk DOWN l, by wyłączyć funkcję aktualizacji. Gaśnie migający na wyświetlaczu r symbol zegarka. 3. Naciśnij przycisk UP 1(, by ponownie włączyć funkcję aktualizacji. Wyświetla się symbol zegarka. 4. Naciśnij ponownie przycisk MODE/ LOCK k, by zapamiętać ustawienie funkcji aktualizacji i przejść do ustawienia trybu czasu 12- lub 24-godzinnego. Ustawianie wyświetlania godziny w formacie 12- lub 24-godzinnym 1. Gdy radio jest w trybie automatyki naciśnij pięć razy przycisk MODE/LOCK k. Na wyświetlaczu r pokaże się wskazanie 24 HOUR, oznaczające wyświetlanie godziny w formacie 24-godzinnym. 2. Naciśnij przycisk DOWN l, aby ustawić wyświetlanie godziny w formacie 12-godzinnym. Na wyświetlaczu r pokaże się liczba 12 HOUR. Naciśnij przycisk UP 1(, aby ponownie przełączyć na wyświetlanie godziny w formacie 24-godzinnym. W trybie 12-godzinnym, w przedziale czasu między 0:00 a 11:59 za wskazaniem czasu wyświetla się AM (ante meridiem = przed południem), zaś w przedziale czasu od 12:00 do 23:59 PM (post meridiem = po południu) na wyświetlaczu r. Naciśnij przycisk MODE/LOCK k, by zapamiętać i zamknąć ustawienia menu. Pozostałe możliwości ustawień Ustawianie jasności wyświetlacza Naciskaj przycisk LIGHT/DIMMER j, by ustawić jasność podświetlania wyświetlacza. Jasność można ustawiać w 3 zakresach. Podświetlana listwa zaciskowa Do listwy zaciskowej d możesz przyczepiać kartki, np. recepty, o szerokości około 10 cm, które będą automatycznie trzymane przez urządzenie. Po naciśnięciu przycisku LIGHT/DIMMER j i przytrzymaniu go przez 2 sekundy, włączy się oświetlenie skierowane w dół, które będzie podświetlało receptę lub inne podobne dokumenty. Naciśnij i przytrzymaj ponownie przycisk j przez dwie sekundy, by ponownie wyłączyć światło. Minutnik 1. Naciśnij przycisk TIMER s. 2. Za pomocą przycisków UP /DOWN 1(/l ustaw żądany czas (możliwe jest ustawienie czasu odliczania od 1 minuty do 23:59 h). Naciśnięcie i przytrzymanie jednego z przycisków spowoduje zmianę w odstępach co 10 min. Alternatywnie naciśnij jeden z przycisków M1 M4 t i, by wybrać jeden z zaprogramowanych preselekcyjnie czasów minutnika. Fabrycznie zaprogramowano następujące czasy: Przycisk M1 t = 5 min. (wskazanie = T1) Przycisk M2 y = 10 min. (wskazanie = T2) Przycisk M3 u = 15 min. (wskazanie = T3) Przycisk M4 i = 20 min. (wskazanie = T4)
22 3. Ponownie naciśnij przycisk TIMER s, aby włączyć minutnik. Na wyświetlaczu r wyświetla się symbol zegarka odmierzającego czas do tyłu oraz symbol garnka sekund przed upływem ustawionego czasu, co 5 sekund rozlega się sygnał akustyczny, który wraz z upływem czasu rozlega się w coraz krótszych odstępach. Po upływie czasu, sygnał dźwiękowy jest ciągły i stopniowo wzrasta jego głośność. 5. Naciśnij dowolny przycisk, by zakończyć alarm, nawet przy włączonej blokadzie przycisków. Przerywanie odliczania czasu na minutniku W celu przerwania odliczania czasu minutnika, naciskając przycisk TIMER s przejdź do trybu minutnika. Następnie naciśnij krótko przycisk TIMER s, by przerwać odliczanie czasu minutnika. Odliczanie czasu zostanie przerwane, wskazanie na wyświetlaczu r miga przez okres 10 sekund. Potem urządzenie powróci do trybu automatycznego. W celu ponownego rozpoczęcia odliczania czasu minutnika, naciśnij krótko przycisk TIMER s, by ponownie przejść do trybu minutnika. Ponownie naciśnij przycisk TIMER s. Rozpocznie się dalsze odliczanie czasu. By całkowicie wyłączyć minutnik, naciśnij i przytrzymaj przez 3 sekundy przycisk TIMER s. Symbol zegarka i garnka znika. Programowanie minutnika Możesz zaprogramować najczęściej używane czasy minutnika, by nie musieć ich za każdym razem ustawiać od podstaw. Ze względu na to, że urządzenie może być obsługiwane przez kilka osób, można w nim zaprogramować profile użytkowników, A/B. Każdy z użytkowników będzie mógł wtedy korzystać z 4 niezależnych czasów zaprogramowanych w minutniku. 1. Najpierw wybierz żądanego użytkownika. By zmienić użytkownika, naciśnij i przytrzymaj przez dwie sekundy przycisk USER/BAND h. 2. Następnie naciśnij przycisk TIMER s. 3. Za pomocą przycisków UP /DOWN 1(/l ustaw żądany czas. 4. Naciśnij przycisk MEM/AMS o. Z prawej strony obok wskazanie czasu zapala się T. 5. Naciśnij jeden z przycisków preselekcyjnych M1 M4 t i, pod którym zostanie zaprogramowany czas minutnika. Numer tego czasu wyświetli się z prawej strony obok litery T. 6. Naciśnij ponownie przycisk MEM/AMS o, by zamknąć zapamiętywanie. Funkcja budzenia (alarm 1 i 2) W radiu kuchennym można zaprogramować dwa czasy budzenia. Funkcja budzenia Sygnały akustyczne Radio Wyłączona Symbol na wyświetlaczu r brak symbolu 1. W trybie automatyki naciśnij przycisk AL1/VOL. + g (lub AL2/VOL. f). Na wyświetlaczu r przez 10 sekund miga ostatnio ustawiony czas budzenia i symbol typu alarmu. 2. Naciskaj przyciski UP /DOWN 1(/ l, aby ustawić żądany czas budzenia. 3. Naciśnij przycisk AL1/VOL. + g (lub AL2/VOL. f) tyle razy, aż na wyświetlaczu r pojawi się symbol żądanej funkcji budzenia (patrz tabela powyżej). 4. Naciśnij ponownie przycisk TIMER s, by ustawić dni tygodnia, w których będzie
23 się włączał budzik: Możesz wybrać dni robocze (Mo, Tu, We, Th, Fr), weekend (Su, Sa) i codziennie (Su, Mo, Tu, We, Th, Fr, Sa). Sprawdź wskazanie na wyświetlaczu r: Mo = poniedziałek Tu = wtorek We = środa Th = czwartek Fr = piątek Sa = sobota Su = niedziela 5. Jeśli przytrzymasz przycisk TIMER s przez okres 2 sekund, możesz następnie wybrać określony dzień tygodnia (np. tylko "We"), ponownie krótko naciskając przycisk TIMER s. Wybrane ustawienie pokaże się na wyświetlaczu r. 6. Aby powrócić do wyboru dni roboczych, weekendu lub całego tygodnia, ponownie naciśnij i przytrzymaj przez 2 sekundy przycisk TIMER s. 7. Po upływie 10 sekund miganie na wyświetlaczu ustaje i wprowadzone pozycje zostają zapamiętane. Urządzenie powraca do trybu automatyki. Jeśli włączy się alarm... i wybrana jest opcja budzenia Radio, to włączy się radio i będzie grało na określonym wcześniej poziomie głośności przez 1 godzinę. W celu zakończenia naciśnij dowolny przycisk, nawet przy włączonej blokadzie przycisków. i wybrana jest opcja budzenia Sygnał akustyczny, to przez 10 minut będą rozbrzmiewały sygnały akustyczne o rosnącym poziomie głośności. W celu zakończenia naciśnij dowolny przycisk, nawet przy włączonej blokadzie przycisków. Funkcja przypominania Urządzenie przypomni ci o dacie, która została ustawiona w funkcji przypominania. W tym wypadku o ustawionej godzinie na 10 minut uruchomi się dźwiękowy alarm funkcji przypominacza Do tego na wyświetlaczu r miga wskazanie SDA. Naciśnij dowolny przycisk, by zakończyć alarm funkcji przypominacza, nawet przy włączonej blokadzie przycisków. Słuchanie radia W celu odbioru stacji radiowych całkowicie rozwiń antenę przewodową e i metodą prób i błędów określ najbardziej korzystne ustawienie anteny. Do odbioru stacji nadających na falach średnich służy antena ferrytowa. Jeśli odbiór na paśmie MW jest słaby, obróć urządzenie aż do uzyskania lepszego odbioru. Włączenie lub wyłączenie funkcji radia 1. Naciśnij przycisk ON/AOT/OFF 2!, by włączyć funkcję radia!. Na wyświetlaczu r wyświetla się aktualna częstotliwość odbioru. 2. Ponownie naciśnij przycisk ON/AOT/ OFF 2!, aby wyłączyć funkcję radia i przestawić urządzenie w tryb automatyczny. UWAGA: Naciskając i przytrzymując przycisk ON/AOT/OFF 2! przejdź do funkcji zegara sterującego czasem wyłączenia (zobacz strona 23 rozdział Zegar sterujący czasem wyłączenia AOT). Ręczne wyszukiwanie stacji 1. Za pomocą przycisku USER/BAND h wybierz żądane pasmo radiowe: MW (AM) lub UKF (FM). 2. Naciśnij ponownie krótko przycisk UP 1(, by rozpocząć wyszukiwanie stacji radiowych o wyższych częstotliwościach, niż częstotliwość wyświetlana na wyświetlaczu r. 3. Naciśnij ponownie krótko przycisk DOWN l, by rozpocząć wyszukiwanie stacji radiowych o niższych częstotliwościach, niż częstotliwość wyświetlana na wyświetlaczu r.
Utasítások. Üzembe helyezés
 HASZNÁLATI ÚTMUTATÓ Üzembe helyezés Utasítások Windows XP / Vista / Windows 7 / Windows 8 rendszerben történő telepítéshez 1 Töltse le az AORUS makróalkalmazás telepítőjét az AORUS hivatalos webhelyéről.
Using the CW-Net in a user defined IP network
 Using the CW-Net in a user defined IP network Data transmission and device control through IP platform CW-Net Basically, CableWorld's CW-Net operates in the 10.123.13.xxx IP address range. User Defined
MINO V2 ÁLLVÁNY CSERÉJE V4-RE
 MINO V2 remote controlled MINO V2 ÁLLVÁNY CSERÉJE V4-RE Mino V3 circuit board replacement Mino V2-V4 csere készlet ezüst Art# 59348S, Mino V2-V4 csere készlet fehér Art# 59348W V4 áramköri lap Art# 75914
KN-CP50. MANUAL (p. 2) Digital compass. ANLEITUNG (s. 4) Digitaler Kompass. GEBRUIKSAANWIJZING (p. 10) Digitaal kompas
 Digital compass. ANLEITUNG (s. 4) Digitaler Kompass. GEBRUIKSAANWIJZING (p. 10) Digitaal kompas") KN-CP50 MANUAL (p. ) Digital compass ANLEITUNG (s. 4) Digitaler Kompass MODE D EMPLOI (p. 7) Boussole numérique GEBRUIKSAANWIJZING (p. 0) Digitaal kompas MANUALE (p. ) Bussola digitale MANUAL DE USO (p.
KN-CP50 MANUAL (p. ) Digital compass ANLEITUNG (s. 4) Digitaler Kompass MODE D EMPLOI (p. 7) Boussole numérique GEBRUIKSAANWIJZING (p. 0) Digitaal kompas MANUALE (p. ) Bussola digitale MANUAL DE USO (p.
MAKING MODERN LIVING POSSIBLE. Danfoss Heating Solutions
 MAKING MODERN LIVING POSSIBLE Danfoss Danfoss Link Link HC Hidronikus HC Hydronic szabályozó Controller Szerelési Installation útmutató Guide Danfoss Heating Solutions Szerelési útmutató Tartalomjegyzék
Lexington Public Schools 146 Maple Street Lexington, Massachusetts 02420
 146 Maple Street Lexington, Massachusetts 02420 Surplus Printing Equipment For Sale Key Dates/Times: Item Date Time Location Release of Bid 10/23/2014 11:00 a.m. http://lps.lexingtonma.org (under Quick
BKI13ATEX0030/1 EK-Típus Vizsgálati Tanúsítvány/ EC-Type Examination Certificate 1. kiegészítés / Amendment 1 MSZ EN 60079-31:2014
 (1) EK-TípusVizsgálati Tanúsítvány (2) A potenciálisan robbanásveszélyes környezetben történő alkalmazásra szánt berendezések, védelmi rendszerek 94/9/EK Direktíva / Equipment or Protective Systems Intended
INSTALLATION MANUAL For authorized service personnel only.
 Connection Method CHASSIS TYPE A AIR CONDITIONER OPTIONAL PARTS Communication box kit PART NO. 9317807005 INSTALLATION MANUAL For authorized service personnel only. 1. SAFETY PRES Contents 1. SAFETY PRES...
EL-ES03HQ. English Deutsch Français Nederlands Italiano Español Magyar Suomi Svenska Česky Română Ελληνικά. MANUAL (p. 2) TV SMART POWER SAVER
 TV SMART POWER SAVER") MANUAL (p. 2) TV SMART POWER SAVER MODE D EMPLOI (p. 8) Economiseur d énergie intelligent pour TV MANUALE (p. 14) RISPARMIATORE DI ENERGIA PER TV HASZNÁLATI ÚTMUTATÓ (o. 20.) INTELLIGENS TV ENERGIAMEGTAKARÍTÓ
MANUAL (p. 2) TV SMART POWER SAVER MODE D EMPLOI (p. 8) Economiseur d énergie intelligent pour TV MANUALE (p. 14) RISPARMIATORE DI ENERGIA PER TV HASZNÁLATI ÚTMUTATÓ (o. 20.) INTELLIGENS TV ENERGIAMEGTAKARÍTÓ
Contact us Toll free (800) fax (800)
 fax (800)") Table of Contents Thank you for purchasing our product, your business is greatly appreciated. If you have any questions, comments, or concerns with the product you received please contact the factory.
Table of Contents Thank you for purchasing our product, your business is greatly appreciated. If you have any questions, comments, or concerns with the product you received please contact the factory.
VR Instraction Manual. For more information, refer to the user manual for akai-atd.com site. The PDF form file is available.
 VR-5580 Instraction Manual For more information, refer to the user manual for akai-atd.com site. The PDF form file is available. 1. POWER OFF 1. Long press the power on button to start it up,power on page
Széchenyi István Egyetem www.sze.hu/~herno
 Oldal: 1/6 A feladat során megismerkedünk a C# és a LabVIEW összekapcsolásának egy lehetőségével, pontosabban nagyon egyszerű C#- ban írt kódból fordítunk DLL-t, amit meghívunk LabVIEW-ból. Az eljárás
MP3-FMTRANS50. MANUAL (p. 2) CAR MP3 FM+BLUETOOTH TRANSMITTER INCL. REMOTE CONTROL. ANLEITUNG (s. 4) AUTO MP3 FM+BT TRANSMITTER INKL.
 CAR MP3 FM+BLUETOOTH TRANSMITTER INCL. REMOTE CONTROL. ANLEITUNG (s. 4) AUTO MP3 FM+BT TRANSMITTER INKL.") MP3-FMTRANS50 MANUAL (p. 2) CAR MP3 FM+BLUETOOTH TRANSMITTER INCL. REMOTE CONTROL ANLEITUNG (s. 4) AUTO MP3 FM+BT TRANSMITTER INKL. FB MODE D EMPLOI (p. 6) Transmetteur MP3, FM + Bluetooth avec télécommande
MP3-FMTRANS50 MANUAL (p. 2) CAR MP3 FM+BLUETOOTH TRANSMITTER INCL. REMOTE CONTROL ANLEITUNG (s. 4) AUTO MP3 FM+BT TRANSMITTER INKL. FB MODE D EMPLOI (p. 6) Transmetteur MP3, FM + Bluetooth avec télécommande
KH 2029 MULTI-BAND RADIO. Operating instructions ODBIORNIK RADIOWY Instrukcja obsługi VILÁGVEVŐ RÁDIÓ Használati utasítás
 4A MULTI-BAND RADIO KH 2029 MULTI-BAND RADIO Operating instructions ODBIORNIK RADIOWY Instrukcja obsługi VILÁGVEVŐ RÁDIÓ Használati utasítás KOMPERNASS GMBH BURGSTRASSE 21 D-44867 BOCHUM www.kompernass.com
RADIO KH RADIO Operating instructions RADIO KOMPAKTOWE Instrukcja obsługi KOMPAKT RÁDIÓ Használati utasítás
 4A RADIO KH 2352 RADIO Operating instructions RADIO KOMPAKTOWE Instrukcja obsługi KOMPAKT RÁDIÓ Használati utasítás KOMPERNASS GMBH BURGSTRASSE 21 D-44867 BOCHUM www.kompernass.com ID-Nr.: KH2352-08/08-V1
STUDENT LOGBOOK. 1 week general practice course for the 6 th year medical students SEMMELWEIS EGYETEM. Name of the student:
 STUDENT LOGBOOK 1 week general practice course for the 6 th year medical students Name of the student: Dates of the practice course: Name of the tutor: Address of the family practice: Tel: Please read
Proxer 7 Manager szoftver felhasználói leírás
 Proxer 7 Manager szoftver felhasználói leírás A program az induláskor elkezdi keresni az eszközöket. Ha van olyan eszköz, amely virtuális billentyűzetként van beállítva, akkor azokat is kijelzi. Azokkal
EN United in diversity EN A8-0206/419. Amendment
 22.3.2019 A8-0206/419 419 Article 2 paragraph 4 point a point i (i) the identity of the road transport operator; (i) the identity of the road transport operator by means of its intra-community tax identification
T Á J É K O Z T A T Ó. A 1108INT számú nyomtatvány a http://www.nav.gov.hu webcímen a Letöltések Nyomtatványkitöltő programok fülön érhető el.
 T Á J É K O Z T A T Ó A 1108INT számú nyomtatvány a http://www.nav.gov.hu webcímen a Letöltések Nyomtatványkitöltő programok fülön érhető el. A Nyomtatványkitöltő programok fület választva a megjelenő
Ültetési és öntözési javaslatok. Planting and watering instructions
 Ültetési és öntözési javaslatok Planting and watering instructions 1 Önöntöző-rendszer Sub-irrigation 2 Kedves növénykedvelő A LECHUZA önöntöző rendszerrel növényeink természetüknél fogva gyönyörű virágokat
English PATROL 24VDC SOROMPÓ HASZNÁLATI UTASÍTÁS
 English PATROL 24VDC SOROMPÓ HASZNÁLATI UTASÍTÁS English 3.3 Hand configuration changing As standard the system is supplied in right-hand configuration. To fit the barrier in the left-hand position, follow
REMOTE RADAR DETECTOR (connectable to GPS DETECTOR device.) BEÉPÍTHETŐ RADARDETEKTOR (GPS DETECTOR készülékhez) USER MANUAL / HASZNÁLATI ÚTMUTATÓ
 BEÉPÍTHETŐ RADARDETEKTOR (GPS DETECTOR készülékhez) USER MANUAL / HASZNÁLATI ÚTMUTATÓ") REMOTE RADAR DETECTOR (connectable to GPS DETECTOR device.) BEÉPÍTHETŐ RADARDETEKTOR (GPS DETECTOR készülékhez) USER MANUAL / HASZNÁLATI ÚTMUTATÓ 1 REMOTE RADAR DETECTOR (connectable to GPS DETECTOR device.)
REMOTE RADAR DETECTOR (connectable to GPS DETECTOR device.) BEÉPÍTHETŐ RADARDETEKTOR (GPS DETECTOR készülékhez) USER MANUAL / HASZNÁLATI ÚTMUTATÓ 1 REMOTE RADAR DETECTOR (connectable to GPS DETECTOR device.)
USER MANUAL Guest user
 USER MANUAL Guest user 1 Welcome in Kutatótér (Researchroom) Top menu 1. Click on it and the left side menu will pop up 2. With the slider you can make left side menu visible 3. Font side: enlarging font
Használati útmutató HANDELSINFORMATIONEN FÜR DEN KUNDEN COMMERCIËLE INFORMATIES VOOR DE KLANT SLT955 SLT955. ökocímke
 INFORMAZIONI COMMERCIALI PER I CONSUMATORI COMMERCIAL INFORMATION FOR THE CONSUMER INFORMATIONS COMMERCIALES POUR LE CLIENT INFORMACIONES COMERCIALES PARA EL CLIENTE Használati útmutató HANDELSINFORMATIONEN
NASODRILL ORRSPRAY: TARTÁLY- ÉS DOBOZFELIRAT, VALAMINT A BETEGTÁJÉKOZTATÓ SZÖVEGE. CSECSEMŐ GYERMEK FELNŐTT 100 ml-es üveg
 NASODRILL ORRSPRAY: TARTÁLY- ÉS DOBOZFELIRAT, VALAMINT A BETEGTÁJÉKOZTATÓ SZÖVEGE TARTÁLY - BOTTLE NASAL LAVAGE For chronic or recurring infection NASODRILL Formulated with thermal Luchon water naturally
ASUS GX800 lézeres játékegér
 ASUS GX800 lézeres játékegér 1 6 Felhasználói kézikönyv HUG5761 Elsö kiadás (V1) Május 2010 Copyright 2010 ASUSTeK Computer Inc. All Rights Reserved. Az ASUSTeK COMPUTER INC. ( ASUS ) előzetes írásos engedélye
ENROLLMENT FORM / BEIRATKOZÁSI ADATLAP
 ENROLLMENT FORM / BEIRATKOZÁSI ADATLAP CHILD S DATA / GYERMEK ADATAI PLEASE FILL IN THIS INFORMATION WITH DATA BASED ON OFFICIAL DOCUMENTS / KÉRJÜK, TÖLTSE KI A HIVATALOS DOKUMENTUMOKBAN SZEREPLŐ ADATOK
Presenter SNP6000. Register your product and get support at HU Felhasználói kézikönyv
 Register your product and get support at www.philips.com/welcome Presenter SNP6000 HU Felhasználói kézikönyv 1 a b c d e 2 3 4 Federal Communication Commission Interference Statement This equipment has
Formula Sound árlista
 MIXERS FF-6000; FF6000P Formula Sound 160 6 channel dual format DJ mixer with removable fader panel. (Supplied with linear faders) Formula Sound 160P As above but with PRO X crossfade fitted. Formula Sound
English Magyar Slovenščina Česky V 3.42
 English... 2 Magyar... 83 Slovenščina... 164 Česky... 245 V 3.42 Content Introduction... 5 Intended use... 6 Supplied items... 7 Overview... 8 LED indicators... 9 Technical data... 10 Safety instructions...
Construction of a cube given with its centre and a sideline
 Transformation of a plane of projection Construction of a cube given with its centre and a sideline Exercise. Given the center O and a sideline e of a cube, where e is a vertical line. Construct the projections
Cég név: Készítette: Telefon:
 Pozíció Darab Leírás 1 SCALA2 3-45 A Dátum: 218. 2. 9. Cikkszám: 98562862 Grundfos SCALA2 is a fully integrated, self-priming, compact waterworks for pressure boosting in domestic applications. SCALA2
PIACI HIRDETMÉNY / MARKET NOTICE
 PIACI HIRDETMÉNY / MARKET NOTICE HUPX DAM Másnapi Aukció / HUPX DAM Day-Ahead Auction Iktatási szám / Notice #: Dátum / Of: 18/11/2014 HUPX-MN-DAM-2014-0023 Tárgy / Subject: Változások a HUPX másnapi piac
későbbi használat esetére Őrizzük meg az útmutatót.
 4H01 típus későbbi használat esetére Őrizzük meg az útmutatót. A készüléket 8 év alatti gyermekek, valamint testi, mentális, érzékszervi fogyatékkal élő személyek, továbbá a kellő tapasztalattal, tudással
OLYMPICS! SUMMER CAMP
 OLYMPICS! SUMMER CAMP YOUNG BUSINESS CAMP 3D DESIGN CAMP OLYMPICS SUMMER CAMP 20 24 JUNE AND 27 JUNE 1 JULY AGE: 6-14 Our ESB native-speaking teachers will provide a strong English learning content throughout
Tavaszi Sporttábor / Spring Sports Camp. 2016. május 27 29. (péntek vasárnap) 27 29 May 2016 (Friday Sunday)
 27 29 May 2016 (Friday Sunday)") Tavaszi Sporttábor / Spring Sports Camp 2016. május 27 29. (péntek vasárnap) 27 29 May 2016 (Friday Sunday) SZÁLLÁS / ACCOMODDATION on a Hotel Gellért*** szálloda 2 ágyas szobáiban, vagy 2x2 ágyas hostel
Tavaszi Sporttábor / Spring Sports Camp 2016. május 27 29. (péntek vasárnap) 27 29 May 2016 (Friday Sunday) SZÁLLÁS / ACCOMODDATION on a Hotel Gellért*** szálloda 2 ágyas szobáiban, vagy 2x2 ágyas hostel
... HU ÁLLÓ FAGYASZTÓ HASZNÁLATI ÚTMUTATÓ 2 PL ZAMRAŻARKA EUX2243AOX
 EUX2243AOX...... HU ÁLLÓ FAGYASZTÓ HASZNÁLATI ÚTMUTATÓ 2 PL ZAMRAŻARKA INSTRUKCJA OBSŁUGI 21 SZUFLADOWA LV VERTIKĀLI NOVIETOJAMA LIETOŠANAS INSTRUKCIJA 40 SALDĒTAVA SK SKRIŇOVÁ MRAZNIČKA NÁVOD NA POUŽÍVANIE
HAMBURG Használati útmutató Vezérlőmodul UKSM 24VDC Cikkszám: 260.033
 HABURG Használati útmutató Vezérlőmodul UKS 24VDC Cikkszám: 260.033 Brandschutz-Technik und Rauchabzug GmbH Schnackenburgallee 41d D-22525 Hamburg Germany +49 40 89 71 20-0 Fax: +49 40 89 71 20-20 Internet:
16F628A megszakítás kezelése
 16F628A megszakítás kezelése A 'megszakítás' azt jelenti, hogy a program normális, szekvenciális futása valamilyen külső hatás miatt átmenetileg felfüggesztődik, és a vezérlést egy külön rutin, a megszakításkezelő
4-42 ELECTRONICS WX210 - WX240
 4-42 ELECTRONICS WX210 - WX240 PCS 40000499-en Fig. 8 WX210 - WX240 ELECTRONICS 4-43 PCS COMPONENTS 40000471-en Load-limit regulator Legend Fig. 1 Fig. 2 1 Power supply 2 PWM1 output, proportional valve
TRENDnetVIEW Pro szoftvert. ŸGyors telepítési útmutató (1)
") TRENDnetVIEW Pro szoftvert ŸGyors telepítési útmutató (1) TRENDnetVIEW Pro/05.29.2014 Tartalomjegyzék TRENDnetVIEW Pro Management Software követelmények... 13 TRENDnetVIEW Pro Telepítése... 14 Videokamerák
TRENDnetVIEW Pro szoftvert ŸGyors telepítési útmutató (1) TRENDnetVIEW Pro/05.29.2014 Tartalomjegyzék TRENDnetVIEW Pro Management Software követelmények... 13 TRENDnetVIEW Pro Telepítése... 14 Videokamerák
1.1. EGYETLEN KÉSZÜLÉK ÜZEMBE HELYEZÉSE... 124 1.2. KÉT KÉSZÜLÉK ÜZEMBE HELYEZÉSE... 124 2.1. BEKAPCSOLT/KÉSZENLÉTI ÁLLAPOT... 125
 TÁRGYMUTATÓ Fejezet 1: ÜZEMBE HELYEZÉS...124 1.1. EGYETLEN KÉSZÜLÉK ÜZEMBE HELYEZÉSE... 124 1.2. KÉT KÉSZÜLÉK ÜZEMBE HELYEZÉSE... 124 Fejezet 2: FUNKCIÓK...125 2.1. BEKAPCSOLT/KÉSZENLÉTI ÁLLAPOT... 125
Csatlakozás a BME eduroam hálózatához Setting up the BUTE eduroam network
 Csatlakozás a BME eduroam hálózatához Setting up the BUTE eduroam network Table of Contents Windows 7... 2 Windows 8... 6 Windows Phone... 11 Android... 12 iphone... 14 Linux (Debian)... 20 Sebők Márton
ASUS Transformer Pad útmutató
 útmutató TF300TG 3G kapcsolatkezelő A SIM-kártya behelyezése 1. Egy kiegyenesített gemkapocs segítségével nyomja meg a SIMkártyatartó kilökő gombját. HUG7210 2. Vegye ki a tartót. Helyezze el a kártyát
BLUETOOTH CAR RADIO. Operating instructions. Instrukcja obs ługi. Használati utasítás
 4A BLUETOOTH CAR RADIO Operating instructions Instrukcja obs ługi Használati utasítás GB PL HU BLUETOOTH CAR RADIO RADIO SAMOCHODOWE BLUETOOTH BLUETOOTH AUTÓRÁDIÓ KOMPERNASS GMBH BURGSTRASSE 21 D-44867
Használati utasítás az OVC-WF1218 típusú vízszűréses porzsák nélküli háztartási porszívóhoz
 Használati utasítás az OVC-WF1218 típusú vízszűréses porzsák nélküli háztartási porszívóhoz Kérjük, figyelmesen olvassa el a használati utasítást. Biztonsági utasítások: A gépet csak 230V ~ 50Hz váltóáramra
66149_silv_Energiekosten-Messgerät_Content_GB-HU-HR.indd 3 06.06.11 13:19
 A 1 6 5 2 3 4 3 66149_silv_Energiekosten-Messgerät_Content_GB-HU-HR.indd 3 06.06.11 13:19 B 8 7 4 66149_silv_Energiekosten-Messgerät_Content_GB-HU-HR.indd 4 06.06.11 13:19 Introduction Proper use...page
1. Gyakorlat: Telepítés: Windows Server 2008 R2 Enterprise, Core, Windows 7
 1. Gyakorlat: Telepítés: Windows Server 2008 R2 Enterprise, Core, Windows 7 1.1. Új virtuális gép és Windows Server 2008 R2 Enterprise alap lemez létrehozása 1.2. A differenciális lemezek és a két új virtuális
BATHROOM RADIO KH Bathroom Radio Operating instructions Radio do łazienki Instrukcja obsługi Fürdőszobai rádió Használati utasítás
 4A BATHROOM RADIO Bathroom Radio Operating instructions Radio do łazienki Instrukcja obsługi Fürdőszobai rádió Használati utasítás KH 2175 KOMPERNASS GMBH BURGSTRASSE 21 D-44867 BOCHUM www.kompernass.com
Comfort típusú kezelő egység
 Comfort típusú kezelő egység Felhasználói kézikönyv Kezelő egység Tartalom Oldal Rövidítések / Jelentések Rövidítések / jelentések... 2 Nyomógombok azonosítása... 3 Képernyő jelzések... 4 Gyors indítás...
INSTRUCTION OF USE HASZNÁLATI UTASÍTÁS MANUALE D'USO
 INSTRUCTION OF USE HASZNÁLATI UTASÍTÁS MANUALE D'USO 105095101 105095104 105095101 105095104 Tisztelt Vásárló! Köszönjük, hogy az indukciós főzőlapunkat választotta. Annak érdekében, hogy a lehető legjobban
bladeless AR5T90RE ToWER FAn instruction MAnuAl AR5T90RE 220-240V / 50Hz / 45W 220-240v~50Hz 45W
 bladeless AR5T90RE ToWER FAn lapátkerék nélküli instruction MAnuAl torony ventilátor AR5T90RE 220-240V / 50Hz / 45W 220-240v~50Hz 45W PAge 1/7 A jelölt készülék összeszerelését, beüzemelését, használatát
General information for the participants of the GTG Budapest, 2017 meeting
 General information for the participants of the GTG Budapest, 2017 meeting Currency is Hungarian Forint (HUF). 1 EUR 310 HUF, 1000 HUF 3.20 EUR. Climate is continental, which means cold and dry in February
(Asking for permission) (-hatok/-hetek?; Szabad ni? Lehet ni?) Az engedélykérés kifejezésére a következő segédigéket használhatjuk: vagy vagy vagy
 (-hatok/-hetek?; Szabad ni? Lehet ni?) Az engedélykérés kifejezésére a következő segédigéket használhatjuk: vagy vagy vagy") (Asking for permission) (-hatok/-hetek?; Szabad ni? Lehet ni?) SEGÉDIGÉKKEL Az engedélykérés kifejezésére a következő segédigéket használhatjuk: vagy vagy vagy A fenti felsorolásban a magabiztosság/félénkség
(Asking for permission) (-hatok/-hetek?; Szabad ni? Lehet ni?) SEGÉDIGÉKKEL Az engedélykérés kifejezésére a következő segédigéket használhatjuk: vagy vagy vagy A fenti felsorolásban a magabiztosság/félénkség
EN United in diversity EN A8-0206/482. Amendment
 21.3.2019 A8-0206/482 482 Recital 13 g (new) (13g) In recognition of the need for specific treatment for the transport sector, in which movement is the very essence of the work undertaken by drivers, the
ANGOL NYELV KÖZÉPSZINT SZÓBELI VIZSGA I. VIZSGÁZTATÓI PÉLDÁNY
 ANGOL NYELV KÖZÉPSZINT SZÓBELI VIZSGA I. VIZSGÁZTATÓI PÉLDÁNY A feladatsor három részbol áll 1. A vizsgáztató társalgást kezdeményez a vizsgázóval. 2. A vizsgázó egy szituációs feladatban vesz részt a
Kezdőlap > Termékek > Szabályozó rendszerek > EASYLAB és TCU-LON-II szabályozó rendszer LABCONTROL > Érzékelő rendszerek > Típus DS-TRD-01
 Típus DS-TRD FOR EASYLAB FUME CUPBOARD CONTROLLERS Sash distance sensor for the variable, demand-based control of extract air flows in fume cupboards Sash distance measurement For fume cupboards with vertical
THS710A, THS720A, THS730A & THS720P TekScope Reference
 THS710A, THS720A, THS730A & THS720P TekScope Reference 070-9741-01 Getting Started 1 Connect probes or leads. 2 Choose SCOPE 3 or METER mode. Press AUTORANGE. Copyright Tektronix, Inc. Printed in U.S.A.
TI connect, TI connect
 Fully automatic espresso machine Machine à expresso automatique Volautomatische espressomachine Ekspres do kawy Plně automatický kávovar Автоматическая кофемашина TI955... connect, TI957... connect en
Zephyr használati utasítás
 Zephyr használati utasítás fontos óvintézkedések Ez a termék háztartási használatra készült. Elektromos termékek használatánál, különösen gyermekek jelenlétében, mindig be kell tartani a következő alapvető
1. MINTAFELADATSOR KÖZÉPSZINT. Az írásbeli vizsga időtartama: 30 perc. III. Hallott szöveg értése
 Oktatáskutató és Fejlesztő Intézet TÁMOP-3.1.1-11/1-2012-0001 XXI. századi közoktatás (fejlesztés, koordináció) II. szakasz ANGOL NYELV 1. MINTAFELADATSOR KÖZÉPSZINT Az írásbeli vizsga időtartama: 30 perc
DENVER CR-612 Návod pro obsluhu
 DENVER CR-612 Návod pro obsluhu 1. ON/OFF/AUTO (zapnout / vypnout / automatické nastavení) 2. LCD displej 3. Přihrádka pro baterie 4. SNOOZE/SLEEP OFF (odložení buzení / deaktivace režimu sleep 5. ALARM
International Open TABLE TENNIS. Competition to the Memory of János Molnár RESULTS
 International Open RESULTS SCHEDULE Thursday, 6 th February, 2014 Mini cadet single, age group No. 2. (born between 01.01.2002. and 31.12.2002.) and age group No. 3. (born after 01.01.2003.) 15.30 round
LIBRETTO ISTRUZIONI. Használati útmutató
 Italiano English Deutsch Français Español Português LIBRETTO ISTRUZIONI на русском языке Cod. 110030252 (CAPPE AD ISOLA) Használati útmutató INSTRUCTIONS BOOKLET BEDIENUNGSSANLEITUNG Sziget páraelszívókhoz
EN United in diversity EN A8-0206/445. Amendment
 21.3.2019 A8-0206/445 445 Title Proposal for a DIRECTIVE OF THE EUROPEAN PARLIAMENT AND OF THE COUNCIL amending Directive 2006/22/EC as regards enforcement requirements and laying down specific rules with
ANGOL NYELV KÖZÉPSZINT SZÓBELI VIZSGA I. VIZSGÁZTATÓI PÉLDÁNY
 ANGOL NYELV KÖZÉPSZINT SZÓBELI VIZSGA I. VIZSGÁZTATÓI PÉLDÁNY A feladatsor három részből áll 1. A vizsgáztató társalgást kezdeményez a vizsgázóval. 2. A vizsgázó egy szituációs feladatban vesz részt a
3. MINTAFELADATSOR KÖZÉPSZINT. Az írásbeli vizsga időtartama: 30 perc. III. Hallott szöveg értése
 Oktatáskutató és Fejlesztő Intézet TÁMOP-3.1.1-11/1-2012-0001 XXI. századi közoktatás (fejlesztés, koordináció) II. szakasz ANGOL NYELV 3. MINTAFELADATSOR KÖZÉPSZINT Az írásbeli vizsga időtartama: 30 perc
MAKING MODERN LIVING POSSIBLE
 MAKING MODERN LIVING POSSIBLE Link CC Central - Központi Controller vezérlő Installation Szerelési útmutató Guide DANFOSS HEATING SOLUTIONS Link CC - Bevezetés Tartalomjegyzék Bevezetés...3 Szerelés...4
FAMILY STRUCTURES THROUGH THE LIFE CYCLE
 FAMILY STRUCTURES THROUGH THE LIFE CYCLE István Harcsa Judit Monostori A magyar társadalom 2012-ben: trendek és perspektívák EU összehasonlításban Budapest, 2012 november 22-23 Introduction Factors which
HU) FIGYELMEZTETÉS! EN) WARNING!
 FIGYELMEZTETÉS! EN) WARNING!") OJ u C nice HU) FIGYELMEZTETÉS! Gondosan olvassa el és pontosan kövesse ezeket az utasításokat, és tartsa meg, hogy a jövőben is használhassa. A telepítést "szakember" módjára, szigorúan a telepítési utasításokat
OJ u C nice HU) FIGYELMEZTETÉS! Gondosan olvassa el és pontosan kövesse ezeket az utasításokat, és tartsa meg, hogy a jövőben is használhassa. A telepítést "szakember" módjára, szigorúan a telepítési utasításokat
Személyes adatváltoztatási formanyomtatvány- Magyarország / Personal Data Change Form - Hungary
 Személyes adatváltoztatási formanyomtatvány- Magyarország / Personal Data Change Form - Hungary KITÖLTÉSI ÚTMUTATÓ: A formanyomtatványon a munkavállaló a személyes adatainak módosítását kezdeményezheti.
Vezérlő Panel. Electrónico. Elektromos kapcsoló doboz
 Az ENERGIE SY225 Elektronik a termodinamikai szolár rendszer vezérlő és kontrol egysége. Ez teszi lehetővé a működési paraméterek beállítását és a rendszer működésének ellenőrzését. Elektromos kapcsoló
Budapest By Vince Kiado, Klösz György
 Budapest 1900 2000 By Vince Kiado, Klösz György Download Ebook : budapest 1900 2000 in PDF Format. also available for mobile reader If you are looking for a book Budapest 1900-2000 by Vince Kiado;Klosz
Paysera VISA cards are secured with "3-D technology" which ensures safer payments with payment cards online.
 Paysera VISA card Safe payments online Paysera VISA cards are secured with "3-D technology" which ensures safer payments with payment cards online. When purchasing at e-shops labelled with "Paysera VISA",
Szundikáló macska Sleeping kitty
 Model: Peter Budai 999. Diagrams: Peter Budai 999.. Oda-visszahajtás átlósan. Fold and unfold diagonally. 2. Behajtunk középre. Fold to the center. 3. Oda-visszahajtások derékszögben. Fold and unfold at
ELEKTRONIKAI ALAPISMERETEK ANGOL NYELVEN
 ÉRETTSÉGI VIZSGA 200. május 4. ELEKTRONIKAI ALAPISMERETEK ANGOL NYELVEN KÖZÉPSZINTŰ ÍRÁSBELI VIZSGA 200. május 4. 8:00 Az írásbeli vizsga időtartama: 80 perc Pótlapok száma Tisztázati Piszkozati OKTATÁSI
XV1100K(C)/XV1100SK(C)
/XV1100SK(C)") Lg C18ahr XV1100K(C)/XV1100SK(C) All rights reserverd. Any reprinting or unauthorized use wihout the written permission of Lg C18ahr Corporation, is expressly prohibited. P/N LIT-11646-12-51 1.1. INTRODUCTION
Lg C18ahr XV1100K(C)/XV1100SK(C) All rights reserverd. Any reprinting or unauthorized use wihout the written permission of Lg C18ahr Corporation, is expressly prohibited. P/N LIT-11646-12-51 1.1. INTRODUCTION
MELLÉKLET / ANNEX. EU MEGFELELŐSÉGI NYILATKOZAT-hoz for EU DECLARATION OF CONFORMITY
 TRACON BUDAPEST KFT. TRACON BUDAPEST LTD. 2120 DUNAKESZI, PALLAG U. 23. TEL.: (27) 540-000, FAX: (27) 540-005 WWW.TRACON.HU EU MEGFELELŐSÉGI NYILATKOZAT, a 79/1997. (XII. 31.) IKIM számú és a 374/2012.
2. Local communities involved in landscape architecture in Óbuda
 Év Tájépítésze pályázat - Wallner Krisztina 2. Közösségi tervezés Óbudán Óbuda jelmondata: Közösséget építünk, ennek megfelelően a formálódó helyi közösségeket bevonva fejlesztik a közterületeket. Békásmegyer-Ófaluban
Az egér bemutatása A B C D A C G H D E G H
 Üzembe helyezés Utasítások Windows XP / Vista / Windows 7 / Windows 8 rendszerben történő telepítéshez 1. Töltse le a HOST Macro Engine telepítőjét a IABYTE hivatalos webhelyéről. 2. Futtassa a telepítőt,
LIBRETTO ISTRUZIONI. Használati útmutató INSTRUCTIONS BOOKLET BEDIENUNGSSANLEITUNG LIVRET D INSTRUCTIONS INSTRUKCJE OBSŁUGI
 Cod. 110030291 (CIELO / AURA) LIBRETTO ISTRUZIONI Használati útmutató INSTRUCTIONS BOOKLET BEDIENUNGSSANLEITUNG LIVRET D INSTRUCTIONS INSTRUKCJE OBSŁUGI Ed. 2014 Italiano English Deutsch Français Español
ELEKTRONIKAI ALAPISMERETEK ANGOL NYELVEN
 ÉRETTSÉGI VIZSGA 2008. május 26. ELEKTRONIKAI ALAPISMERETEK ANGOL NYELVEN KÖZÉPSZINTŰ ÍRÁSBELI VIZSGA 2008. május 26. 8:00 Az írásbeli vizsga időtartama: 180 perc Pótlapok száma Tisztázati Piszkozati OKTATÁSI
Intézményi IKI Gazdasági Nyelvi Vizsga
 Intézményi IKI Gazdasági Nyelvi Vizsga Név:... Születési hely:... Születési dátum (év/hó/nap):... Nyelv: Angol Fok: Alapfok 1. Feladat: Olvasáskészséget mérő feladat 20 pont Olvassa el a szöveget és válaszoljon
(NGB_TA024_1) MÉRÉSI JEGYZŐKÖNYV
 MÉRÉSI JEGYZŐKÖNYV") Kommunikációs rendszerek programozása (NGB_TA024_1) MÉRÉSI JEGYZŐKÖNYV (5. mérés) SIP telefonközpont készítése Trixbox-szal 1 Mérés helye: Széchenyi István Egyetem, L-1/7 laboratórium, 9026 Győr, Egyetem
Kommunikációs rendszerek programozása (NGB_TA024_1) MÉRÉSI JEGYZŐKÖNYV (5. mérés) SIP telefonközpont készítése Trixbox-szal 1 Mérés helye: Széchenyi István Egyetem, L-1/7 laboratórium, 9026 Győr, Egyetem
SAJTÓKÖZLEMÉNY Budapest 2011. július 13.
 SAJTÓKÖZLEMÉNY Budapest 2011. július 13. A MinDig TV a legdinamikusabban bıvülı televíziós szolgáltatás Magyarországon 2011 elsı öt hónapjában - A MinDig TV Extra a vezeték nélküli digitális televíziós
Where are the parrots? (Hol vannak a papagájok?)
") Where are the parrots? (Hol vannak a papagájok?) Hi Agents! This is your final test so get ready. Work your way through the exercises and when you have finished, the letters will spell out the name of
Where are the parrots? (Hol vannak a papagájok?) Hi Agents! This is your final test so get ready. Work your way through the exercises and when you have finished, the letters will spell out the name of
PARTS LIST. Elna Lotus
 Lotus 0 0 KEY PARTS NO. NO. DESCRIPTION 0 0000 000 00000 0000 0000 00 00000 000000 0000 0000 000 000 0000 000000 00000 000000 000 00 00000 00000 0000 0000 000 00000 000000 Upper shaft (unit) Hexagonal
A vitorlázás versenyszabályai a 2013-2016. évekre angol-magyar nyelvű kiadásának változási és hibajegyzéke
 A vitorlázás versenyszabályai a 2013-2016. évekre angol-magyar nyelvű kiadásának változási és hibajegyzéke A dokumentum A vitorlázás versenyszabályai a 2013-2016. évekre angol-magyar nyelvű kiadásában
Cashback 2015 Deposit Promotion teljes szabályzat
 Cashback 2015 Deposit Promotion teljes szabályzat 1. Definitions 1. Definíciók: a) Account Client s trading account or any other accounts and/or registers maintained for Számla Az ügyfél kereskedési számlája
MAGYAR. 9) Összes bekapcsolási idő és 2. egységár szerinti villanydíj megjelenítése és
 Összes bekapcsolási idő és 2. egységár szerinti villanydíj megjelenítése és") Deutsch English Français Bevezetés: MAGYAR Dugaszcsatlakozós (francia/belga változat) hálózati teljesítmény- és energiafigyelő. Feszültség (V), áramerősség (A), hasznos teljesítmény (W), látszólagos teljesítmény
Deutsch English Français Bevezetés: MAGYAR Dugaszcsatlakozós (francia/belga változat) hálózati teljesítmény- és energiafigyelő. Feszültség (V), áramerősség (A), hasznos teljesítmény (W), látszólagos teljesítmény
LIBRETTO ISTRUZIONI. Használati útmutató
 Italiano English Deutsch Français Español Cod. 110030251 (CAPPE CLASSICHE) LIBRETTO ISTRUZIONI Használati útmutató INSTRUCTIONS BOOKLET BEDIENUNGSSANLEITUNG LIVRET D INSTRUCTIONS MANUAL DE INSTRUCCIONES
Hogyan használja az OROS online pótalkatrész jegyzéket?
 Hogyan használja az OROS online pótalkatrész jegyzéket? Program indítása/program starts up Válassza ki a weblap nyelvét/choose the language of the webpage Látogasson el az oros.hu weboldalra, majd klikkeljen
Rába Járműipari Alkatrészgyártó Kft. Szállítói minőségi követelmények
 Rába Járműipari Alkatrészgyártó Kft. Szállítói minőségi követelmények 1., Általános követelmények: Rába Járműipari alkatrészgyártó Kft elvárása a hibamentes beszállítás. Amennyiben nem megfelelő minőségű
Eladni könnyedén? Oracle Sales Cloud. Horváth Tünde Principal Sales Consultant 2014. március 23.
 Eladni könnyedén? Oracle Sales Cloud Horváth Tünde Principal Sales Consultant 2014. március 23. Oracle Confidential Internal/Restricted/Highly Restricted Safe Harbor Statement The following is intended
Felhasználói Útmutató
 USER MANUAL Felhasználói Útmutató Please read this manual carefully before installation and keep it for application Figyelmesen olvassa el az alábbi leírást és őrizze meg további alkalmazásra PREFACE 1.
EnergiaOtthon. Energy Home. Coal-burning. Széntüzelésű. Elektromos
 1. Activity feladatlap card 1 Energy Energiaforrások sources Name Név: Match Párosítsd the a things bal oldalon on the levő left dolgokat to an energy azokkal source a jobb on oldali the right energiaforrásokkal,
Marion Baker Gloucester Virginia Wâv{xáá Éy ZÄÉâvxáàxÜ YÄÉãxÜá
 Marion Baker Gloucester Virginia www.duchessflowers.com marion@duchessflowers.com Wâv{xáá Éy ZÄÉâvxáàxÜ YÄÉãxÜá Williamsburg Farmers Market Marion Baker Specialty Cut Flower Grower Sell Bouquets, cut flowers
A biztonságos munkavégzéssel és a vonatkozó szabványokkal kapcsolatos tudnivalók
 A biztonságos munkavégzéssel és a vonatkozó szabványokkal kapcsolatos tudnivalók Üzleti célú asztali számítógépek Copyright 2006 Hewlett-Packard Development Company, L.P. Az itt található információ értesítés
Mapping Sequencing Reads to a Reference Genome
 Mapping Sequencing Reads to a Reference Genome High Throughput Sequencing RN Example applications: Sequencing a genome (DN) Sequencing a transcriptome and gene expression studies (RN) ChIP (chromatin immunoprecipitation)
Vállalati kockázatkezelés jelentősége
 www.pwc.com/hu Vállalati kockázatkezelés jelentősége Fedor Péter 2013. szeptember 19. Miről lesz szó 1. Mi is az az ERM? 2. Miért fontos? 3. Gyakorlati sajátosságok PwC Magyarország Mi is az az ERM? PwC